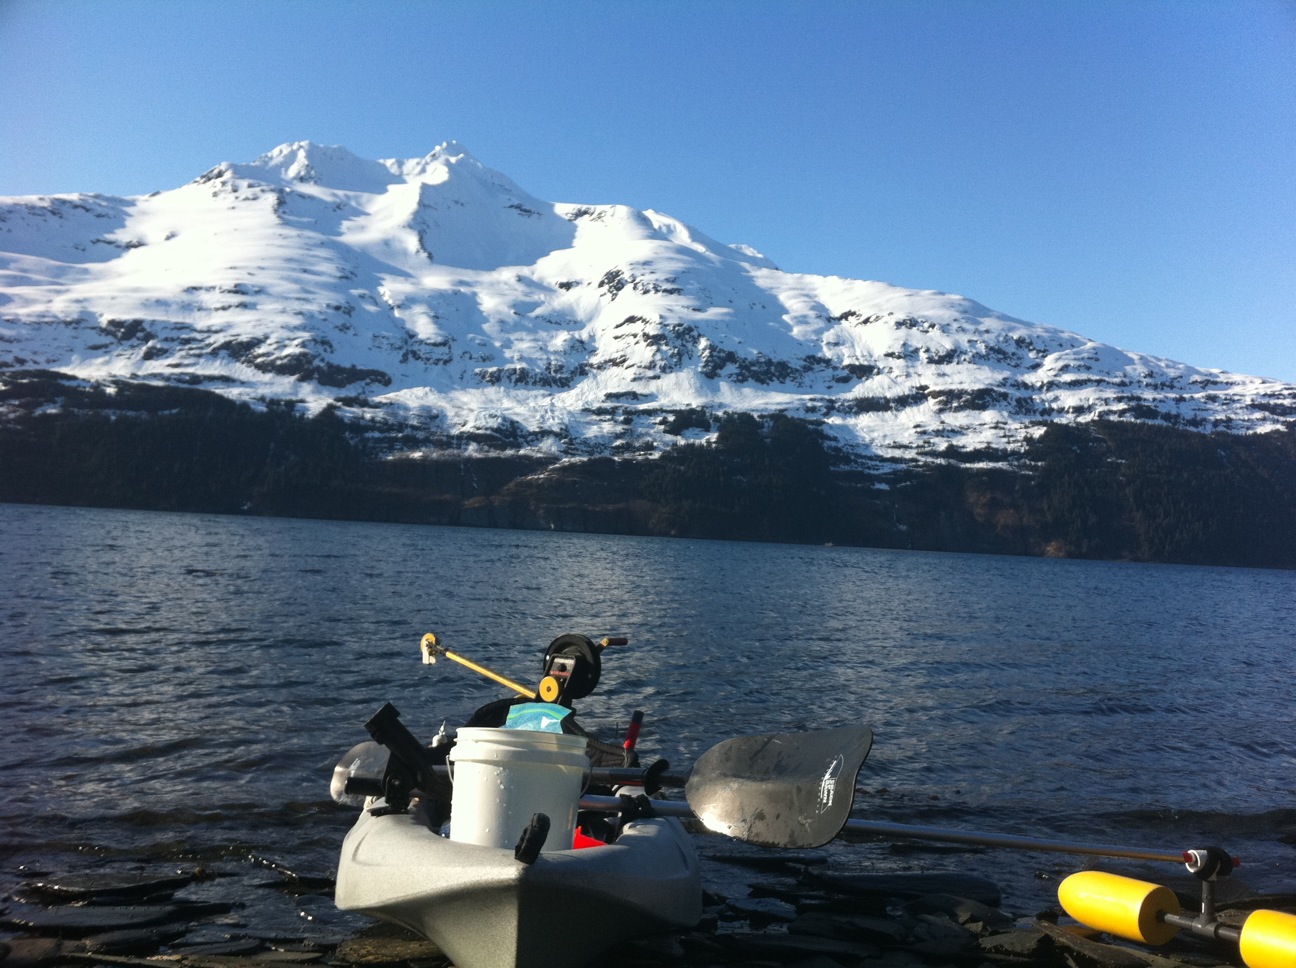
Why can't every day be flat like this?!?!?!
I had to go pick up my test pot that had been in the water over a week due to bad weather. The day I dropped it, the following day forecast was for one foot seas and it turned ugly in a hurry!
Went to work early. Got off at 4:30pm. Left the house at 5:30pm. Made the 6:30 tunnel. In the water by 7pm. Land ho! at 8:05 pm. Easily made the 9pm tunnel. back at home at 10:10pm since traffic was delayed due to a train coming through the tunnel. Despite the long soak and no bait, I had three shrimp! That's three more than I expected!
it was a super light mist and a tiny bit of rain. But it felt warm and there was ZERO wind! Wow. Of course it happens on the day I can't spend any time out there. Mother Nature is TEASING ME!!!!!
Tuesday, April 26, 2011
Monday, April 18, 2011
Shrimping from a Kayak! v1.3
Shrimping out Whittier, Alaska on April 16th out of a Malibu Mini-X Kayak. At 9'3" it's small for use at sea but its stable and worked great! Sitting over 500ft of 40 degree water! Catching Spot and coonstripe shrimp.
Click on the movie after it starts to get to the youtube page for a full screen version or just click this link here: http://youtu.be/GTbdqiY9cZM
Sunday, April 17, 2011
Alright! The sytem works!!!! I'd say 90% success. A few tweaks need to be made on the connection issues. But it catches shrimp and I think for the most part it catches shrimp safely in good weather. I do want to preface it with the following: "At this time, I do not recommend doing this alone. I am not quite sure yet if it is safe as it reasonably can be or if its playing russian roulette with maybe a 20 bullet cylinder.".
So for now pictures and other stuff. I will update later.


Friday, April 15, 2011
I survived!!!!
But Holy cow! This boy is out of shape! So the weather was nice but a little windier than I liked blowing 8-10mph gusting to 15 mph. Spent most of the time on the water paddling against the wind. I'd position then by the time I was ready to go, I would have drifted a 100 yards and I'd have to paddle back upwind again since there was another shrimp pot 150 to 200 yards away I wanted to stay away from.
I think several things were unexpected. The biggest think I noticed was how slow the pots drop. I guess I would have thought the line would be flying off the downrigger but it just kind of lazily turned while the pot fell. I tried to paddle slowly upwind so that the line wasn't at a big angle as it was dropping. Dropped one at 350 initially and 300 ft. I pulled the one at 350 ft after a 90 minute soak and you saw the results. I repositioned it in 425 feet of water.
If I was more experience I bet I could do it WITHOUT an outrigger. But switching positions so often I felt safer. The velcro adhesive to the kayak came off. The velcro on the rings I think are fine but long term I would beef it up. I had one time when the outrigger arm slid in and the reason i noticed was the kayak felt tippier all the sudden so the outrigger was at least holding the kayak level.
The other thing was that it was twice as hard to reel in the line than I expected. But i think a lot of that was due to paddling for a couple of hours and the half a dozen times I repositioned and then picked up the one pot at the end. Somebody in better shape could do it no problem. It wasn't too hard to crank, it just took longer. There is no way I would try this with a reel though. Until i am in better shape, I think one pull in the morning, and one at night and I swill stick to two pots, maybe three.
When pulling it up, I could have the boom pointed pretty much straight backwards. So I didn't feel tippy at all, but I can't say how much was the outriggers. Just wanted to get it done. Will analyze more as I continue to develop the technique.
As is often the case, the only time the wind calmed down was when I paddled to shore for break. Beautiful scenery! Too bad I didn't enjoy as I was too focused on staying alive! lol. I am sure it will get easier but not bad for a first effort I think!!!!!
But in a 90minute soak, I lifted one pot and there were 4 shrimp! 2 spots prawns and 2 coons or one coon and one humpy. Not sure....

Thursday, April 14, 2011
Virtual Shrimping 101
Ok, time to go through a dry run. Good thing! I had to reposition a few things because the way I had them strapped, it was hard to access or unstrap. Too bad someone didn't video tape me. On youtube, people would have thought I was some 2 year old playing pirates or something. lol.
That's equipment for two shrimp pots. I figure maximum deployment depths is 525 ft for the deepest one and 400 feet for the other one. I hope I don't have to set them that deep. I do have one more spool of 900ft. I will split it in two but if I connect them I could send one really deep! OR!!!! Maybe I will attach all the lines and fish SUPER deep with normal hooks just to see what I could dredge up from the bottom. That would really be a bummer if I snagged the bottom with $150 dollars worth of line out...Haha.
So here's how she looks fully loaded:


She is DEFINITELY heavier and it feels a bit tippier but its hard to tell on land. I may have to consider making the outrigger one of those things I have on from the start. Well i guess that's why we test things. For you detail folks, the bucket is upside down since I have velcro on the kayak too. It needs to set 24 hours or it comes right off. Velcro is GOOD STUFF...right after wire and duct tape.
You need to click on the top banner I think to see the other reent posts if you are coming from a link like facebook.
Ok. So here's the finished product.
The most permanent thing I did was to use velcro that had adhesives and put a few inches onto my kayak. Other than that, no holes, nothing permanent.
It is ROCK solid. I think it's going to work, Now its up to the operator.
I used hooks to hold the two sides of the board down. The board was too thin so I drilled a hole in the top of a PVC pipe cap and added a washer and wingnut. The front is just wedged in and held in place by the bungie cords.


Wednesday, April 13, 2011
Now where the heck am I going to put that outboard???
Well I still have to get the attachments for the boards and some screws to connect the T. maybe I might block up under the downrigger. But this is going to be what I head out with this weekend...I hope. I think this is going to work! For version 1.0, it has at least a chance of success!
Thanks again for all the help. I think you can click on the picture to make it larger...

OUT OF TIME!!!! ARGH! Too many things to do, not enough time.
So I have been tapping the collective knowledge of the forums on the Northwest Kayak Anglers home pages. Lots of good info. A lot of it do to the fact the members not only report the good stuff but their epic fails so no one has to repeat them again. As they gave me suggestions I kept thinking "ok, that is good, but might not apply to my issues." Then the final temporary solution turns out to be a compilation of 4 or 5 of their suggestions. So thanks to everyone over there that helped out.
So the temporary solution is this....
Found a piece of hard wood flooring. Cut it into a sort of t shape like suggested by the Cobra Anchor guide on the forums. Need to go get things to secure it but I have figure out its stable enough even with just bungie cords. But I will do it right. Going to use a temporary wood platform as suggested by several members to make sure its where I want it if I ever decide to go to some more permanent and pricier solution.
The T up front is just wedged under the handle. It is as good as being pinned their except its on the very end. It won't move up but it will tip up. Maybe I can notch it a touch to stop lateral movement. Velcro maybe...I like that stuff!
Time to drill the mounts for the holes. I sure hope this works!

Tuesday, April 12, 2011
A couple more issues....
The center mount in front of me isn't going to work. The downrigger is just too close to me. It's got to go behind me.
So here's what I am working with.

Arghh..why can't I rotate the pics?? Any rate...For any temporary or at least semi temporary mount might go on a cutting board I can cut into a piece that would go on the right side of the kayak but basically hang over the open space directly left of the flush rod holder.. It still means drilling holes in the Kayak to mount he plate but the plate would serve two purposes. One, the heavy mount and downrigger would be more center for better balance. Two I could remove the base a lot easier since the nuts on the bolt would not be buried inside my kayak. This is the solution where I would cut out the cutting board on the redlines and bolt it in.
Alternate solution is somehow utilize the two drain holes you see. Maybe fabricate a post that will fit in there and somehow secure it. Velcro? The problem is the holes get skinnier by just a little bit in the middle. I wonder what would happen if I heated a pvc pipe and while hot rammed it in there? Would it form to the tapered holes? This is the green plus red line solution.

I need a solution!!!!! T Minus 50 hours and counting till the opener!!!!!!
Another Problem....
Once again I call upon engineers and creative thinkers.
I got the 360 degree swivel mount. If it was for my boat, I'd think SWEET! But for my kayak it's HEAVY...it's HUGE!!!!!
Isn't there some adage about measure twice cut once? How about get the dimensions and spare yourself 100 bucks. Argh. But I still think this is potentially an integral component of the eventually optimal solution.
So two issues.
1) Where the heck am I going to mount this beast. I may have to go roller on the tip and mount on the hatch. Especially if I can get another spare hatch at a reasonable cost. Then I would make the outriggers much smaller but more permanent design to deploy on the side I would "swing" the pot towards to pull it up onto the yak.
2) It weighs 4.5 pounds! My kayak weighs only 38 pounds. I can't have my mount adding 10% of the weight especially if I mount on the edge. So I need a solid solution to make it a temporary mount with the any additional plate and hardware that might remain permanently attached to the kayak at a very minimum.


I can mount it with a little overhang. It's not going to affect my seating I don't think. I have absolutely have no idea why the bottom edge is jagged like that.
A little help!
Monday, April 11, 2011
Outriggers and Downriggers.
A LOT of extra stuff making its way on to the Yak! I can't bring too much more.
The biggest concern for me was "As out of shape as I am, am I really going to be able to lift 2 pots up from 300 to 600 ft??????" I could just envision myself being so tired, that I just drop them back and wait to get a boat ride from one of my friends.
Well I am glad to announce my first test was a great success! I wanted to improve the connections between the sections of lines so I reewound the first 200 yard section back on to the halibut reel. Then I connected the line back up to the downrigger and set the drag on the halibut reel medium tight (I could still pull line off of it without wrapping it around my hand).
I timed myself reeling in 200 yards/600ft of line with the downriggers with drag on the reel and it took me less than 4 minutes at a sustainable pace. In fact I stopped several times to make sure the line was winding on straight. That is every bit as fast as my friends pulling up pots with their electric pullers. Of course they have more and bigger pots but... Confidence level is HIGH!
Ok, so here's my outrigger solution. Keep in mind I don't need this while moving any distance. I am only going to deploy it when I am raising and lowering pots.
Equipment list:
10 ft telescoping buoy hook
2 shrimp floats
schedule 80 pvc pipe 3/4"
one sched 40 pvc T (but not sure about this weak link yet)
Basically screwed the pipes together after slamming a 12 inch pvc pipe into the floats. barely got it deep enough for my comfort. My put some goop in their and drive them in further. That foam is HARD!

I wish I had a machine shop but I don't! Drills a hand saw, sawzall, and a few pliers is about it.
Use Velcro to strap it on.
 Then velcro it to the Kayak. The plastic loops are very flexible but are definitely the weak link in this system. I bet it snap if I don't reinforce. Not sure how to do that yet. Waiting to see if the adhesive on the back of the velcro will hold on the kayak for more reinforcement. If it doesn't stick, I may just goop and rivet it on. Function over Form!
So it's going to be mounted on the other side. The length is fully adjustable. Once I get the weak connections beefed up. I should be able to stand in it...maybe. I would think with the arm extended that far out, it'd be hard to tip over thee other way. I think a big wake might be a problem if I took it broadside if it was extended that far....hmmmm....
 Posted using BlogPress from my iPhone
A LOT of extra stuff making its way on to the Yak! I can't bring too much more.
The biggest concern for me was "As out of shape as I am, am I really going to be able to lift 2 pots up from 300 to 600 ft??????" I could just envision myself being so tired, that I just drop them back and wait to get a boat ride from one of my friends.
Well I am glad to announce my first test was a great success! I wanted to improve the connections between the sections of lines so I reewound the first 200 yard section back on to the halibut reel. Then I connected the line back up to the downrigger and set the drag on the halibut reel medium tight (I could still pull line off of it without wrapping it around my hand).
I timed myself reeling in 200 yards/600ft of line with the downriggers with drag on the reel and it took me less than 4 minutes at a sustainable pace. In fact I stopped several times to make sure the line was winding on straight. That is every bit as fast as my friends pulling up pots with their electric pullers. Of course they have more and bigger pots but... Confidence level is HIGH!
Ok, so here's my outrigger solution. Keep in mind I don't need this while moving any distance. I am only going to deploy it when I am raising and lowering pots.
Equipment list:
10 ft telescoping buoy hook
2 shrimp floats
schedule 80 pvc pipe 3/4"
one sched 40 pvc T (but not sure about this weak link yet)
Basically screwed the pipes together after slamming a 12 inch pvc pipe into the floats. barely got it deep enough for my comfort. My put some goop in their and drive them in further. That foam is HARD!

I wish I had a machine shop but I don't! Drills a hand saw, sawzall, and a few pliers is about it.
Use Velcro to strap it on.
 Then velcro it to the Kayak. The plastic loops are very flexible but are definitely the weak link in this system. I bet it snap if I don't reinforce. Not sure how to do that yet. Waiting to see if the adhesive on the back of the velcro will hold on the kayak for more reinforcement. If it doesn't stick, I may just goop and rivet it on. Function over Form!
Sunday, April 10, 2011
Do the twist!
Downrigger connection Soultion #1
First I am sucking it up and buying the 360 degree swivel mount. No way around it...even with outriggers. So the downrigger has to DO THE TWIST!
So here's my first proposed solution, I am going to tie a long bimini TWIST knot at the end of each leader. That way it can stay clipped in between the drum and the pulley, but the loop is long enough that it clears the last guide.
I can clip the buoy on before I unclip the mainline to make sure that I don't lose it...which is always a possibility when you are holding on to spectra line.
So Here's the complete set up:

Not sure why I can't rotate the pics.
But close up of the loop. The loop on the red line line is the same loop long loop tied at the end with a bimini TWIST knot. So once the buoy is secured, I can unlip the line to line connection.


When I work on things I need to wrap the line on something so I don't cut my hands. The solution is a schedule 80 pvc section with a grovve cut down an inch on one end so I can put the line into the grovve, wind it on itself a half dozen times, and stick it in the rod holder. I can then work on the loose end without any tension.

The next upgrade is the temporary but hopefully stable outrigger...but that is for another day.
Thursday, April 07, 2011
Downrigger dilemma
So how am I going to transfer the the line from the buoy to the downrigger???? I have no clue.
If I do it before the pulley, I have to have a connector small enough to pass through the guides which I want to keep.
In between the drum and guides, I could use a fairly large clip, but I have to lean way out and thread it through the guides and not tip over. Solution required!

- Posted using BlogPress from my iPhone
Tuesday, April 05, 2011
Monday, April 04, 2011


Thought I'd try the mobile blog app.
Headed to Big Lake to retrieve Martin's fish house. Road was getting soft but the ice was still 3 ft thick! Fished 25 ft of water and managed 3 char and a burbot for three people fishing. Not hot but good action for a while.


- Posted using BlogPress from my iPhone
Headed to Big Lake to retrieve Martin's fish house. Road was getting soft but the ice was still 3 ft thick! Fished 25 ft of water and managed 3 char and a burbot for three people fishing. Not hot but good action for a while.


- Posted using BlogPress from my iPhone
Subscribe to:
Posts (Atom)